Monday, November 29, 2010

cleaning spyware/malware in safe mode using malwarebytes

To get the most surefire cleaning from malwarebytes to remove malware from an infected computer, I recommend running malwarebytes in safe mode. This tutorial will guide you trough booting into safe mode with networking and then running malwarebytes.

Step 1:
The first thing you need to do is shut down your computer. Do this normally using Start -> Shutdown. Instead of choosing restart, you should shut the computer all the way down.
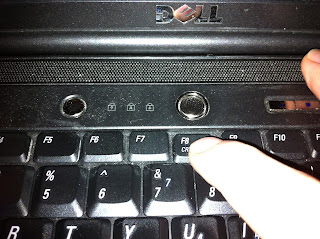
Step 2:
Turn the computer on and, wait approximately one second and then start pressing the F8 key about 2 times per second. There is a brief time window early during the booting process when we can reach the advanced startup menu. It's hard to see, so we just press F8 repaeatedly until we see it.
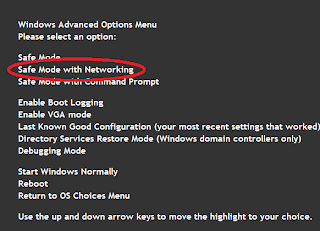
Step 3:

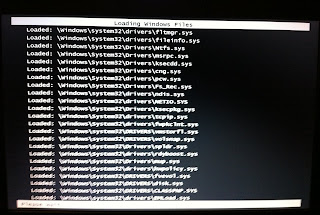
Choose Safe Mode with Networking in the advanced startup menu. Afterward, you'll get a bunch of diagnostic info on the screen about what is loading. This is normal. You can ignore it. (If you don't get the advanced start menu, your computer will boot normally. Shut down again and start on step 1).


Step 4:

Log in normally.

Step 5:

If you are asked if you want to continue in safe mode or run a system restore , hit YES - so that you continue to work in safe mode.


Step 6:

If you have already downloaded and installed Malwarebytes, run it now and skip to step 8. If not, go to step 7.
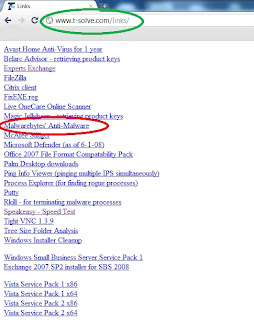

Step 7:

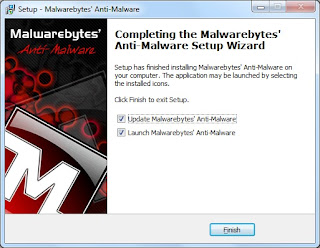
You can download and install Malwareware bytes from www.t-solve.com/links. Download and install Malwarebytes (you can accept all the defaults).


Step 8:

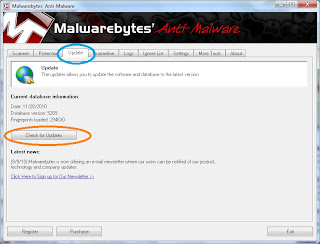
With the software open, run an update by going to the update tab and then pressing check for updates.


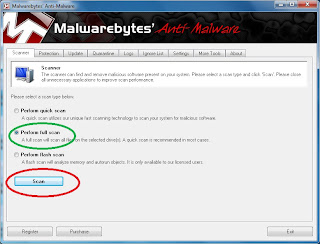
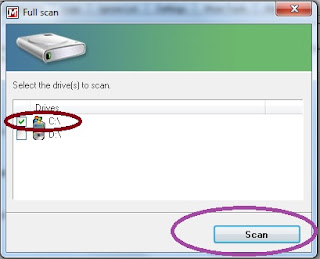
Go to the scanner tab. Choose a full scan and press scan. Then in the next box, choose the C drive and hit scan.


This scan will take anywhere from 30 minutes to 2 hours depending on the speed of your computer and the number of files that Malwarebytes needs to scan. With most computers that are a year old or newer, a scan will usually take 45 to 60 minutes.
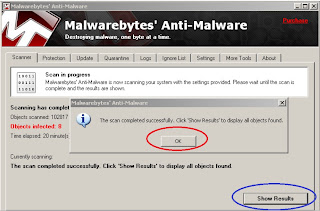
Step 9:

With the scan complete, you'll see that it found objects infected. At this point, click OK and then Show Results.
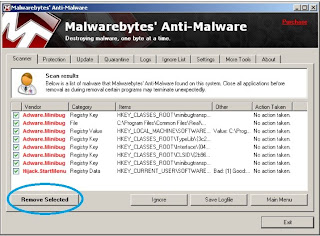


Step 10:

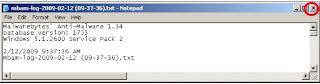
Click on "remove selected" on the next window that comes up. Then close text window that comes up next and click YES to restart your computer (sometimes you are not prompted to restart your computer - that's ok - you'll want to restart anyway to get out of safe mode).


After the reboot, log in normally, and you should be clean from all the malware that infected you before.


Wednesday, November 24, 2010

tool for editing/adding SSL certificates to Exchange 2007 / SBS 2008

This tool:


has been a great help to me in the management of multi-domain SSL certificates (UCC or SAN certificates). Particularly for SBS 2008, you need to use the Exchange shell to add a multi-domain SSL certificate, but this GUI tool will easily help you add it.

Monday, November 22, 2010

installing Exchange 2007 SP 3 on SBS 2008

Installing Exchange 2007 SP 3 on SBS 2008 is pretty easy, with one weird exception. As per this page:


You need to stop the "Windows SBS Manager" service to allow the service pack to run. In the two service pack installations I've done so far, each time it complained about the datacollectorsvc - which as the above article says is stopped when you stop the Windows SBS Manager.

Sunday, November 14, 2010

adding Sigmatel drivers on older Dells

I have a Dell Vostro 1400 that has a Sigmatel audio device. I had to reformat it with Windows 7, but the Windows HD driver that Windows installed didn't work quite right. For some reason, the speakers wouldn't work - only headphones when you plugged them in.

I ended up installing the Vista driver as recommended by this article (which also includes a link to the driver since Dell's link for that driver on their site is not working as of 11/14/10).

Tuesday, November 9, 2010

contacting Google Apps tech support

Finding the support form for Google Apps isn't as easy as it should be. It's here (updated 8/4/14):

To use it, you need an education or premier account and need the customer pin and support pin that you get on the support tab of your dashboard.

Monday, November 8, 2010

google app migration thoughts from small Exchange domain

I did my second organization wide (only 8 users) migration from Exchange to Google Apps over the weekend, and I thought I'd just summarize what I saw what I think are best practices for a migration.

1) Check with necessary staff to make sure you have a complete list of all mailboxes, aliases, and distribution lists you need.

2) Create all accounts before any other processes.

3) investigate the size of mailboxes you are migrating. One of the mailboxes I was migrating was 11.5 GB (he intentionally didn't want it to archive). It took 70 hours to download and upload using my home FIOS. In my case, I would rather have gotten his Exchange data on the LAN instead of the 33 hours it took to download the data from the server. I'd say it's pretty important to plan bandwidth utilization as it's very easy to choke up the bandwidth with a large upload. Ideally, you're uploading one mailbox at a time over the fastest upstream internet connection you have available to you.

4) alter the MX records (ideally on a Friday night)

5) wait at least 12 hours for DNS records to change so all mailboxes on the Exchange server are static and are not longer receiving an email

6) begin uploading data from the fastest internet connection possible - or multiple connections - if you can - I've had one instance where I've had trouble with the Google Sync for Outlook - https://tools.google.com/dlpage/gappssync - though I still think it's the preferred tool. Another option for uploading mail, which doens't seem any quicker and still allows you to upload only one mailbox at a time is the Google Apps Migration for Microsoft Outlook tool here - http://tools.google.com/dlpage/outlookmigration. The problem I had with the migration for Outlook tool was that it wasn't naming the labels/folders correctly. If you had a label folder of Inbox/General - it showed up as PSTNAME/Inbox/General and not as a subfolder of inbox. Strange - though easily fixed. I guess the real difference between the two is whether an admin is doing it or if it's being done on the user's computer. On an admin's computer, he/she can use the Google migration tool to upload a PST file while he/she has his own Outlook open. For a user on his/her computer, you'd want Google Apps sync so Outlook would be usable while the data is uploading. Though from personal experience, you don't want people uploading data during the daytime. It can completely choke off your upstream bandwidth.

7) emulate functionality as best you can of Outlook using these options:

a) enable iphones to use ActiveSync -> as a Google admin -> Service Settings -> Mobile -> Turn on Google Sync
a) set up iphones using this link for instructions - http://www.google.com%2fsupport%2fmobile%2fbin%2fanswer.py%3fanswer%3d138740%26topic%3d14252
c) enable calendar sharing using these instructions - http://mail.google.com/support/a/bin/answer.py?hl=en&answer=170958
d) enable users to allow delegation of their accounts - as a Google admin -> Service Settings -> Email -> Let users delegate access to their mailbox to others in the domain. (of note - this seems to be available in the premier version but not the education edition as of 11/15/10)
e) tell users how to delegate their mailboes using these instructions - http://mail.google.com/support/bin/answer.py?answer=170957


8) make sure each computer is set up properly with Outlook configured for the google apps account (using Google Apps Sync at https://tools.google.com/dlpage/gappssync). Set it up as the default profile and also rename the NK2 file so that the autofill address book is retained.

a) be aware that the autofill address book will contain some old Exchange specific addresses that will fail when sending from google apps. As such, it's probably best practice to manually open a new message on the computer and delete each user on the Exchange/Google server since each entry was probably an X400 address and wouldn't work on the Google Apps server and will just cause confusion.