Saturday, December 20, 2014
adding USB connected Time Capsule printers to PCs
This is more of a self reminder. If you have a network printer that is connected via USB to a Time Capsule - you need to install Bonjour on any PCs you have in order to see/connect to the printer. Run Bonjour, and Bonjour will find the printer and then go through the printer installation process.
Friday, November 14, 2014
Internet Explorer proxy settings won't change - "some settings are managed by system adminsitrator"
Credit for this solution belongs here:
I came across a computer with a malware infection that had its Internet Explorer proxy settings configured, but I couldn't remove the proxy settings. When I went to internet properties, it said "some settings are managed by system adminsitrator"

This computer was not part of a domain and had nothing set in local policies. The fix was to change the value for ProxySettingsPerUser from 0 to 1 in the registry here:
HKEY_LOCAL_MACHINE\Software\Policies\Microsoft\Windows\CurrentVersion\Internet Settings -> ProxySettingsPerUser
I came across a computer with a malware infection that had its Internet Explorer proxy settings configured, but I couldn't remove the proxy settings. When I went to internet properties, it said "some settings are managed by system adminsitrator"
This computer was not part of a domain and had nothing set in local policies. The fix was to change the value for ProxySettingsPerUser from 0 to 1 in the registry here:
HKEY_LOCAL_MACHINE\Software\Policies\Microsoft\Windows\CurrentVersion\Internet Settings -> ProxySettingsPerUser
Sunday, November 2, 2014
Computer replacement plan
I've often struggled with a hard and fast policy for replacing laptops in a business environment. Some people swear by a 3 year rotation, some go up to 5 years. Some use equipment until the old equipment wears out. I've decided that this is what I'm going to recommend to my clients:
Laptops with conventional hard drives - replace after 3 years
Laptops with SSD hard drives - replace after 4 years
Desktops (aggressive) - replace after 4 years
Desktops (conservative) - replace after 5 years
This is as much about likelihood of failure as speed after a certain amount of time.
Laptops with conventional hard drives - replace after 3 years
Laptops with SSD hard drives - replace after 4 years
Desktops (aggressive) - replace after 4 years
Desktops (conservative) - replace after 5 years
This is as much about likelihood of failure as speed after a certain amount of time.
Friday, October 24, 2014
Recovering lost Word (or other MS Office) documents
I'm adding a third tool to my chest on recovering MS Word (or other Office documents).
You can access ASD files (autorecover files) here:
%userprofile%\AppData\Roaming\Microsoft\Word
Other places to look for missing files (per this post):
C:\Users\%username%\AppData\Local\Microsoft\Windows\Temporary Internet Files\Content.Outlook
Or via this method to recover unsaved Word docs:
http://t-solve.blogspot.com/2014/09/retrieving-document-from-office-2010.html
Wednesday, October 15, 2014
Firefox opens up with a black screen in all profiles
I had a Dell Latitude E6220 on 32 bit Windows 7 SP 1 and each time I'd open up Firefox in any profile, the screen was totally black. This did not happen in safe mode (hold down shift while starting Firefox) or when I RDP'd to the computer. I reset Firefox settings to no avail.
The solution was to disable hardware acceleration via Options -> Advanced. If your Firefox is opening up with the black screen, you can disable hardware acceleration in safe mode.
The solution was to disable hardware acceleration via Options -> Advanced. If your Firefox is opening up with the black screen, you can disable hardware acceleration in safe mode.
Saturday, October 4, 2014
SSL cert errors for old Exchange server after you've already moved to Office365
My users began getting SSL cert errors in Outlook after the SSL cert on my old mail server expired. This was weird because I had moved my company's email to Office365 more than a year earlier. It looked something like this:

Quick research led to the idea that Outlook was looking at the autodiscover for the internal server when connected to the LAN as opposed to the CNAME record that pointed to autodiscover.outlook.com
The fix . . .
First run this on your old mail server in an Exchange shell to see where your autodiscover is currently pointing:
Get-ClientAccessServer | fl AutoDiscoverServiceInternalUri
If it's pointing to your internal server with the expired certificate, that's a problem. To fix that, run this command in the Exchange shell (assuming your server is named server1):
Set-ClientAccessServer -Identity "server1" -AutoDiscoverServiceInternalUri "https://autodiscover.outlook.com" -AutoDiscoverSiteScope "Mail"
or I could disable internal autodiscover via this command (assuming your server is named server1):
Set-ClientAccessServer -Identity “server1″ -AutoDiscoverServiceInternalUri $NULL
Friday, September 26, 2014
To do list when an employee departs an organization
When an employee leaves an organization, these are the steps that should be followed after his/her departure:
Thursday, September 4, 2014
List of changes to make in mailman listserv from list defaults
This list of changes is under general options:
The list administrator email addresses. Multiple administrator addresses, each on separate line is okay.
administrator email address
The list moderator email addresses. Multiple moderator addresses, each on separate line is okay.
administrator email address
Send monthly password reminders?
No
Send welcome message to newly subscribed members?
No
Maximum length in kilobytes (KB) of a message body. Use 0 for no limit.
8000
Under Privacy Options -> Recipient Filters:
Ceiling on acceptable number of recipients for a posting.
0
Tuesday, September 2, 2014
Retrieving a document from Office 2010 when you close it and choose not to save
A user showed this to me - a method for retrieving a document from Office 2010 when you close it and choose not to save.
Let's say you've got a document and choose "Don't Save" when you close Word.

You can re-open Word and go to File - Recent and click on "Previous Unsaved Documents"

You'll find that you have your list of unsaved documents available for you to open.

Let's say you've got a document and choose "Don't Save" when you close Word.
You can re-open Word and go to File - Recent and click on "Previous Unsaved Documents"
You'll find that you have your list of unsaved documents available for you to open.
Wednesday, August 27, 2014
Configuring VOIP priority on a Fortigate firewall
IMPORTANT NOTE - If you are sending your voice traffic over a route based IPSec VPN, the WAN interface you'll be referencing will the the name of the VPN interface (for example DCtoSF instead of WAN1).
I put together this list of CLI commands to enter on a Fortigate firewall to give VOIP traffic priority. Some instructions may vary based on your setup, but I took most of these from Fortigate cookbooks and then fixed all the typos. I use the CLI commands because the GUI (my preference) didn't have all the options where they were supposed to be in my test box. I tested this on Fortigate 40C running version 5.0 of the firmware.
config firewall shaper traffic-shaper
edit voip
set maximum-bandwidth 1000
set guaranteed-bandwidth 800
set per-policy enable
set priority high
end
then
config firewall policy
edit 6
set srcintf internal
set srcaddr all
set dstintf wan1
set dstaddr all
set action accept
set schedule always
set service SIP
set traffic-shaper voip
set traffic-shaper-reverse voip
end
Please also note these steps for disabling SIP ALG and other processes to allow VOIP phones behind a Fortigate firewall.
Sunday, August 24, 2014
Setup for a new user on an existing computer - edited 8/24/14
Edited 8/24/14 - this is a list of things to do when creating a new user and adding him/her to an existing computer.
- Create user in Active Directory (and if applicable) separate server where mail is configured
- Add user to appropriate distribution lists (allstaff, etc)
- Boot up computer and as required, change the name of the computer to include the appropriate initials for the new user
- Install all applicable updates (for Windows and Office)
- Ensure all applicable programs are installed including (but not limited to):
a. PDF995
b. Adobe Acrobat Standard/Reader
c. NitroPDF
d. MS Project
e. MS Visio
f. TightVNC
g. Skype
h. Google Talk
i. QuickBooks
j. Malwarebytes
k. Java - Make sure MS Office is up to date on the applicable version for the organization
- Configure Outlook for company's mail server
- Confirm antivirus is installed and up to date
- Set up user for any shared staff calendars and/or contacts lists
- Configure VPN connection with access for all users and save username and password and put icon on desktop
- Add user as local administrator on new computer
- Put appropriate icons for frequently accessed programs on desktop (Computer, Word, Excel, Outlook, terminal server icon, VPN icon, accounting software if applicable)
- Add user to address book on company scan to email copier
- Disable WLAN card when connected to wired ethernet if possible (configurable in device manager for Dell branded WLAN cards)
- Alter user's name on phone
- Alter extension's voicemail to email properties
- Make sure the user's phone is not forwarding to another person
- Confirm backup is working properly for the new user.
- Set up mobile broadband card
- Track computer's serial number in inventory spreadsheet and make sure user's name is noted as current user for computer
Friday, August 22, 2014
Configuring Office365 on difficult XP computer
This entry will have no value to anyone else. It's a specific situation for my own notes. On the computer named Vostro1500-INTE, the Outlook 2010 has consistent trouble with configuring the Office365 account.

I tried all these things.
In the end, I found that the fix was to 1) create a new Windows profile and 2) disable the crappy Trend Micro antivirus. Of note, I recreated the profile at first wihtout disabling AV and I had trouble configuring email - so perhaps disabling the AV was necessary.
I tried all these things.
- Create new mail profile
- Setting the login/email address to username@domain.onmicrosoft.com
- Set DNS servers to 8.8.8.8 instead of internal DNS
- Create and connect to VPN without split tunnel
In the end, I found that the fix was to 1) create a new Windows profile and 2) disable the crappy Trend Micro antivirus. Of note, I recreated the profile at first wihtout disabling AV and I had trouble configuring email - so perhaps disabling the AV was necessary.
Sunday, August 10, 2014
Using a Windows Server as an authenticated relay server to Office365
If you've got an on-premise device that doesn't support TLS and you're on Office365 (or other outsourced Exchange), you're in a bind. Most of the info here comes from this article:
http://www.configureoffice365.com/configure-office-365-smtp-relay/
I'm copying and pasting parts of it below, simplifying parts, and adding my own hints. This presumes Windows Server 2008. Some Windows 2012 steps are here.
Part 1 - Add IIS if not already installed
Part 3 - Add TLS certificate
http://www.configureoffice365.com/configure-office-365-smtp-relay/
I'm copying and pasting parts of it below, simplifying parts, and adding my own hints. This presumes Windows Server 2008. Some Windows 2012 steps are here.
Part 1 - Add IIS if not already installed
- In Server Manager, select Add Roles.
- On the Select Server Roles page, select Web Server (IIS) and select Install.
- Select Next until you get to the Select Role Services page.
- In addition to what is already selected, make sure that ODBC Logging, IIS Metabase Compatibility, and IIS 6 Management Console are selected and then select Next.
- When you’re prompted to install IIS, select Install. You may need to restart the server after the installation is finished.
Part 2 - Install SMTP
- Open Server Manager and select Add Features.
- On the Select Features screen, choose SMTP Server. You may be prompted to install additional components. If that’s the case, select Add Required Features and select Next.
- Select Install. After the installation is finished, you may have to start the SMTP service by using the Services snap-in for the Microsoft Management Console (MMC).
- Office 365 requires TLS encryption and for this server to use TLS, it must have a certificate installed.
- In order to do this the Web Server (IIS) role and IIS Management Console must be installed (needs to be added via Server Manager -> Add Roles).
- To create the self-signed certificate: (Start->Administrative Tools->Internet Information Services (IIS) Manager->Select Host->Server Certificates->Create Self-Signed Certificate)
Part 4 - Configure SMTP server relay
- Start->Administrative Tools->Internet Information Services (IIS) 6.0 Manager.
- Click on the ‘+’ next to your host name.
- Right-click on the [SMTP Virtual Server…] and select Properties. It’s now time to step through each of the tabs to configure the SMTP relay.
- General Tab: The IP address should be set to (All Unassigned)
- Access Tab: Click Authentication… and select the Anonymous access check box.
- Access Tab: Click Connection… Select ‘All Except the list below’ and leave the list below blank. This allows any device inside your firewall to access this relay.
- Access Tab: Click Relay… Select ‘All Except the list below’ and leave the list below blank. This allows any device inside your firewall to access this relay.
- Messages Tab: No changes. The default works well.
- Delivery Tab: Click Outbound Security… Select Basic authentication and enter the username and password that is used to send e-mail to the external server (Office 365 in this case). The user name must be a fully qualified (ex: user@companyname.com) valid Office 365 user licensed for Exchange. Check TLS encryption.
- Delivery Tab: Click Outbound connections… Set the TCP port to 587.
- Delivery Tab: Click Advanced Delivery and set the Fully-qualified domain name box to the name of the local server that is acting as the relay (ex: myserver1.domain.local). Set the Smart host the full-qualified name of the Office 365 SMTP Server (as of 8/6/14 - this is smtp.office365.com in all cases). Make sure the “Attempt direct…” box is unchecked.
- LDAP Routing and Security Tabs: No changes to these areas.
- Now there has to be a remote domain setup with the Office 365 domain name in it. Click the ‘+’ next to the [SMTP Virtual Server…] item
- Right-click on Domains and select New-Domain which will launch a Wizard.
- Select Remote and Next.
- Enter the name of the Office 365 vanity domain (ex: mycompany.com)
- Now this remote domain will be setup very similarly to the overall SMTP server. Right-click on the new domain name and select Properties.
- Select Forward all mail to smart host and enter the same Office 365 SMTP Server as above (ex. smtp.office365.com)
- Click on Outbound Security and configure the same as above. Select Basic authentication and enter the username and password that is used to send e-mail to the external server (Office 365 in this case). The user name must be a fully qualified (ex: user@companyname.com) valid Office 365 user licensed for Exchange. Check TLS encryption
- Repeat steps 14 through 19 where step 16 is *.com for the domain
- Repeat steps 14 through 19 where step 16 is *.org for the domain
Part 5 - Configure the on-premise device
- Configure the on-premise device (copier, phone system, etc) with the IP address for the Windows server you have been working with as the SMTP server
- For email address, enter the same address you entered in Part 4 step 9
- Use port 25 and no authentication of any kind and no SSL or any other kind of encryption
Troubleshooting tips
- Make sure the firewall on the Windows server allows connections on port 25. A good test is "telnet 10.0.0.18 25" where 10.0.0.18 might be the IP address of the server you're using as the relay
- I've seen instances where the first emails can take up to 90 minutes to relay. I cannot explain this. But it is true.
- As a test, try using Windows Mail or Outlook as a test mechanism. If it succeeds through your test program, it's just a matter of configuring your device (copier, etc) properly
- On the relay server, there can be error messages located here if things aren't coming through after 90 minutes - C:\inetpub\mailroot\Badmail
Wednesday, July 30, 2014
Keyboard shortcuts to rotate the laptop screen
You can use the keyboard shortcut of control-alt and the arrow keys to alter the rotation of a laptop screen. This is most valuable when users accidentally rotate their screens . . . where you can return the screen to normal orientation via:
Control - alt - UP arrow
If you wanted, you could rotate the screen using these keyboard shortcuts:
Control - alt - UP arrow - 0 degrees
Control - alt - RIGHT arrow - 90 degrees
Control - alt - UP arrow
If you wanted, you could rotate the screen using these keyboard shortcuts:
Control - alt - UP arrow - 0 degrees
Control - alt - RIGHT arrow - 90 degrees
Control - alt - DOWN arrow - 180 degrees
Control - alt - LEFT arrow - 270 degrees
Friday, July 25, 2014
Increasing the size of Hyper-V virtual disk on Win 2008 R2
I had to increase the size of a virtual machine on a Windows 2008 R2 host. I'd go to the settings of the VM and click on "edit" would be greyed out when attempting to edit the hard drive size. It looked like this.

I needed to do three things to resize the disk:
1) shut down the VM
2) Delete all the snapshots of the VM
3) Let the VM merge itself to all previous snapshots - see this
It can take minutes or hours for the merge (#3 above) to take effect.
After the merge has taken place, you can increase the size of the disk and then you'll need to extend the size of the hard drive within Windows of the VM:
Monday, July 14, 2014
Moving Legacy X.500 addresses to Office 365 from on-premise servers
I migrated from SBS 2003 to Office365, but I didn't use one of the standard method. I recreated the users in the cloud and impored PSTs via Outlook. This works fine except for the problem with internal routing where internal addresses use X.500 addresses and generate NDRs when sending to internal staff.
This is a helpful article on using the NDR text to create the X.500 address, though I found its instructions not quite right.
http://support.microsoft.com/kb/2807779
In my case, I found a slight adjustment needed to make it work.
Let's say you're getting an NDR that says:
IMCEAEX-_O=DOMAIN_OU=FIRST+20ADMINISTRATIVE+20GROUP_CN=RECIPIENTS_CN=JSMITH@namprd07.prod.outlook.com
For the user jsmith, create a new Exchange email address with a type of X500 (no period in the type - it is X500 not X.500), and enter the value with adjustments as suggested by MS in the article above:
Replace any underscore character (_) with a slash character (/).
Replace "+20" with a blank space.
Replace "+28" with an opening parenthesis character.
Replace "+29" with a closing parenthesis character.
Delete the "IMCEAEX-" string.
Delete the "@mgd.domain.com" string.
Add "X500:" at the beginning.

This is a helpful article on using the NDR text to create the X.500 address, though I found its instructions not quite right.
http://support.microsoft.com/kb/2807779
In my case, I found a slight adjustment needed to make it work.
Let's say you're getting an NDR that says:
IMCEAEX-_O=DOMAIN_OU=FIRST+20ADMINISTRATIVE+20GROUP_CN=RECIPIENTS_CN=JSMITH@namprd07.prod.outlook.com
For the user jsmith, create a new Exchange email address with a type of X500 (no period in the type - it is X500 not X.500), and enter the value with adjustments as suggested by MS in the article above:
Replace any underscore character (_) with a slash character (/).
Replace "+20" with a blank space.
Replace "+28" with an opening parenthesis character.
Replace "+29" with a closing parenthesis character.
Delete the "IMCEAEX-" string.
Delete the "@mgd.domain.com" string.
As an example, I turned this:
IMCEAEX-_o=ExchangeLabs_ou=Exchange+20Administrative+20Group+20+28FYDIBOHF23SPDLT+29_cn=Recipients_cn=e0c06d4eee7e4ec8b8a38d105ca7793c-joe@namprd08.prod.outlook.com
into this:
/o=ExchangeLabs/ou=Exchange Administrative Group (FYDIBOHF23SPDLT)/cn=Recipients/cn=e0c06d4eee7e4ec8b8a38d105ca7793c-joe
In the case above, I moved an Exchange mailbox from one account to another (via exporting the old mailbox to PST and importing into a new mailbox on a new account).
Friday, July 4, 2014
installing Postfix on Ubuntu as an internal mail server
I had a client who wanted to have an internal email server for sending outbound emails. This email server would be used for sending scans (via scan to email) where the copier didn't support TLS and the email server required TLS and also for email blasts (where users send out mass emails via a local software program like WorldCast).
I successfully implemented Postfix running on Ubuntu.
These directions (relevant on 7/3/14) and derived from here:
https://www.digitalocean.com/community/tutorials/how-to-install-and-setup-postfix-on-ubuntu-12-04
This will allow you to configure any local mail client to send out unauthenticated emails from these subnets:
192.168.0.0
192.168.1.0
192.168.2.0
192.168.3.0
Just set the SMTP server as the with the IP address of the Ubuntu machine (preferably a virtual machine).
Create a new virtual machine with 2 GB of RAM and 30 GB of HD space.
Download and install Ubuntu Linux from here (964 MB):
http://www.ubuntu.com/download/desktop/thank-you/?version=14.04&architecture=amd64
Once installed using all logical defaults, click the search button in the top of the toolbar and type terminal and run the terminal
Run this:
sudo apt-get install postfix
During the installation, you will see a dialogue box appear, asking you which kind of installation you would prefer. Select “Internet Site”.
For domain name, enter:
domainname.com
(where domainname.com is your domain name - though in truth this is irrelevant)
Once Postfix is installed there are a few steps that need to be taken before it is fully functional.
Once Postfix is installed, go ahead and open the main configuration file.
sudo nano /etc/postfix/main.cf
There are a few changes that should be made in this file.
myhostname = domainname.com
Change this value:
alias_maps = hash:/etc/postfix/virtual
to this value:
virtual_alias_maps = hash:/etc/postfix/virtual
For the value, my networks, add a space and then this value:
192.168.0.0/22
So it looks like this:
mynetworks = 127.0.0.0/8 [::ffff:127.0.0.0]/104 [::1]/128 192.168.0.0/22
The rest of the lines are set by default. Save, exit, and reload the configuration file to put your changes into effect:
sudo /etc/init.d/postfix reload
Of note - this is an outbound only email server. Separately, you need to make sure you can send out on port 25 (via your firewall and ISP) and that you're not violating any SPF records with this server (or you may need to adjust SPF records).
Thursday, July 3, 2014
Speed test that doesn't require Flash
When I'm running a speed test on a server, I'm often in a small bind as I can't run my standard tests at www.speakeasy.net/speedtest or www.speedtest.net since most servers don't have flash and it's typically an obstacle to install it.
I found an HTML 5 speed test at www.speedof.me which works just fine, which works just fine on Firefox, which is typically my default browser.
I found an HTML 5 speed test at www.speedof.me which works just fine, which works just fine on Firefox, which is typically my default browser.
Wednesday, June 11, 2014
Excel files in use by 'another user' (user on Excel 2010)
I had a scenario where I had a remote user on a Wind 7 Pro SP 1 64 bit machine connecting to my SBS 2011 box and getting an error about Excel files being in use by 'another user.' I turned off the auto-preview in Windows Explorer to no avail. I looked through this page also to no avail:
http://blogs.technet.com/b/the_microsoft_excel_support_team_blog/archive/2012/05/14/the-definitive-locked-file-post.aspx
The eventual solution was the registry entry change from the client machine described here:
http://support.microsoft.com/kb/942146
http://blogs.technet.com/b/the_microsoft_excel_support_team_blog/archive/2012/05/14/the-definitive-locked-file-post.aspx
The eventual solution was the registry entry change from the client machine described here:
http://support.microsoft.com/kb/942146
Thursday, May 29, 2014
enable ping replies from Windows Server 2008
I had a Windows 2008 R2 server that would not reply to pings. This server was not the member of a domain (it was a standalone Hyper-V host). I fixed this by running this from an elevated command prompt:
netsh firewall set icmpsetting 8
I got this from this page:
http://social.technet.microsoft.com/Forums/windowsserver/en-US/082d0229-4137-4210-8b1a-580187c375aa/cannot-ping-windows-server-2008-r2-machine-from-inside-the-network?forum=winserverNIS
netsh firewall set icmpsetting 8
I got this from this page:
http://social.technet.microsoft.com/Forums/windowsserver/en-US/082d0229-4137-4210-8b1a-580187c375aa/cannot-ping-windows-server-2008-r2-machine-from-inside-the-network?forum=winserverNIS
Wednesday, May 28, 2014
display shared Exchange calendars on an iphone/Droid
I'm documenting a solution for display shared calendars (for example your boss's calendar) on an iphone/Droid. I tried this via two Office365 accounts (on two different domains), and it worked well.
Links to explain the process:
http://www.stevieg.org/2010/11/shared-exchange-calendars-on-ios-devices/
http://community.office365.com/en-us/f/158/t/13878.aspx
In essence, you share your boss's Exchange calendar as an iCal calendar (this does require a publishing process via right clicking on the calnendar and choose Share -> Publish this calendar). In my tests, a web link to an .ICS files was created. Send to the employee and the iphone (in my tests) will properly interpret the link as a shared calendar and add it as a calendar in calendars.
Monday, May 12, 2014
Additional mailboxes in Outlook still appearing even after removing them account settings
In my Exchange environments, it's pretty common for me to give one user access to another user's mailbox for any number of reasons. Sometimes, the user has left the orgaization. If Joe has left, I'll give Bob access to Joe's mailbox in Exchange Management Console (giving Bob full access to Joe's mailbox) and then Bob will follow these steps to add Joe's mailbox:
http://www.t-solve.com/clients/instructions/view-other-account-in-outlook2010/
Sometimes, I use this feature for common mailboxes like a careers@domain.com mailbox or and info@domain.com mailbox.
Recently (the last year or so as of 5/12/14), I have found that even when you remove the mailbox using from account settings (from the same method you use to add the mailbox in Outlook), the mailbox does not disappear. An Exchange attribute needs to be changes to remove the user's mailbox.
Let's take the example of Bob opening Joe's mailbox.
Open ADSI Edit.
Drill down until you find the entry representing Joe's account.
Right click on Joe and choose Properties.
Scroll down to MSExchDelegateListLink and double click on that field
Remove Bob's account from the list.
After the steps above are done, Joe's mailbox will disappear from Bob's Outlook.
Screen shot of what you're looking for:
Wednesday, April 16, 2014
fixing hibernation issues on Windows 7
I've got several Dell laptops (Latitude E6410, E6230, E6220) with trouble resuming from hibernation. What I'm seeing most often is the laptop will begin to resume and then sit at the Welcome screen and never go any farther. I'm going to make this my standard protocol for troubleshooting hibernation issues:
http://www.makeuseof.com/tag/when-power-saving-fails-fixing-windows-7-hibernation-issues/
The short version:
http://www.makeuseof.com/tag/when-power-saving-fails-fixing-windows-7-hibernation-issues/
The short version:
- update all hardware drivers
- disable and re-enable hibernation to delete and recreate the hiberfile.sys
(run powercfg.exe /hibernate off and powercfg.exe /hibernate on) - in device manager, turn off all devices that are capable of waking the computer (particularly NICs)
- turn off the auto-hide task bar
- in power options -> advanced settings for the active power profile, disable hybrid sleep
Monday, March 24, 2014
altering retention policy for deleted items in Office365
By default, Office365 mailboxes retain deleted items for 30 days. This is a bit short, I think. I typically like to make this limit 90 days to one year. Here are the powershell commands needed to run to make that happen (365 days in this example):
PS C:\scripts> enable-organizationcustomization
PS C:\scripts> Set-RetentionPolicyTag "Deleted Items" -AgeLimitForRetention 365
This is based on getting into PowerShell, based on my directions here:
http://t-solve.blogspot.com/2013/11/how-i-configure-script-to-get-into.html
PS C:\scripts> enable-organizationcustomization
PS C:\scripts> Set-RetentionPolicyTag "Deleted Items" -AgeLimitForRetention 365
This is based on getting into PowerShell, based on my directions here:
http://t-solve.blogspot.com/2013/11/how-i-configure-script-to-get-into.html
Sunday, March 23, 2014
setting up Blackberry services on Office365
These are the steps to enable Blackberry services on Office365 (running Exchange 2013).
From the admin console, go to service settings -> mobile
Click on Enable service
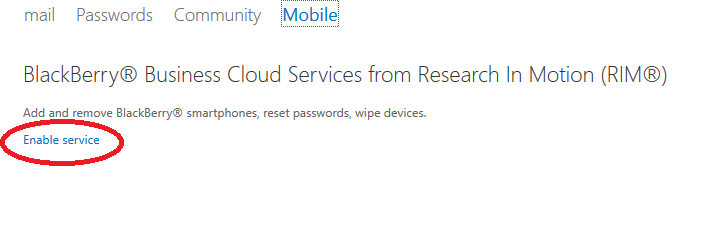
From there, you can manage the service. Of note, as of 3/23/14, I'd get an error when I tried to manage the Blackberry service from IE 11, but I was able to use Chrome. Pretty weird.

From the admin console, go to service settings -> mobile

Click on Enable service
From there, you can manage the service. Of note, as of 3/23/14, I'd get an error when I tried to manage the Blackberry service from IE 11, but I was able to use Chrome. Pretty weird.
Monday, March 3, 2014
Snapshots taking up tons of space on VM host machines
I found myself in a situation where I had a 1 TB drive on a VM host (running Windows 2008 R2) with four virtual machines on it that was completely out of space. I found that there were tons of AVHD files taking up a lot of room. Per what I read, these are snapshot files, even though I deleted the snap shots from the Hyper-V Manager (and cleared up a dozen GB or so), the snapshots were not truly gone.
This page talks a little bit about the process:
http://blogs.msdn.com/b/charles_sterling/archive/2008/08/06/what-are-all-these-avhd-files-hyper-v.aspx?Redirected=true
But in the end, I got the space back by just turning off the virtual machines. When I did so, there was a merge process that went on with the snapshots. In a turned off machine, this just happens automatically. In the end, I turned off the machines and left them off until the "cancel merge in progress" went away. For my largest VM (approx 400 GB of storage), this took about 4 hours.
This is what the cancel merge in progress looks like:
Tuesday, January 21, 2014
Using CUPS to configure Mac printers to default to black and white printing
Below is the video that a copier vendor sent me on setting up CUPS to configure print drivers to print in black and white on Macs. I've had success setting this up on Canon and Xerox printers, but I've found that the option isn't present on Konica Minolta copiers.
Also located here:
http://www.t-solve.com/clients/instructions/CUPS-setup/Set-Print-Defaults-Using-CUPS.mov
Also located here:
http://www.t-solve.com/clients/instructions/CUPS-setup/Set-Print-Defaults-Using-CUPS.mov
Wednesday, January 8, 2014
information to gather when taking over support for another client
This is an ongoing list of things that one should get when taking over IT support of a client (if you can get it):
admin credentials for a domain admin account
login credentials for the router/firewall
Tech Soup login info (if applicable)
Volume licensing information from Microsoft, Symantec, or other vendors as applicable
Account number for ISP
Account number for phone carrier (if supporting phones)
Contact info for phone vendor (if supporting phones)
login credentials for registrar
login credentials for any and all DNS nameservers
Subscribe to:
Posts (Atom)